The vehicle owner meets with the repair facility to discuss the damage and the necessary repairs. Photographs of the damage are taken for record-keeping and insurance purposes.
Pre-repair Vehicle Inspection and Estimate:
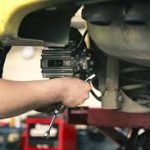
A thorough inspection of the vehicle is conducted to assess the extent of the damage. This includes a pre-repair scan to diagnose any potential problems, including issues with Advanced Driver Assistance Systems (ADAS), which are common in modern vehicles.
An estimate is prepared, detailing the projected total cost of repairs, including the calibration of ADAS back to factory specifications. This estimate is crucial for insurance approval and should be reviewed closely by the vehicle owner.
Insurance Approval:
The repair estimate is submitted to the insurance company for approval. This step may involve negotiation between the repair facility and the insurance company to agree on the repair costs.
Disassembly and Further Assessment:
The vehicle is disassembled in the damaged area(s) to accurately determine all necessary repairs. Sometimes, additional damage is found that was not visible during the initial estimate.
If more damage is discovered, a supplemental report is prepared and submitted to the insurance company for additional approval.
Ordering Parts:
Once all repairs are identified, the necessary parts are ordered. This step can vary in time depending on the availability of parts.
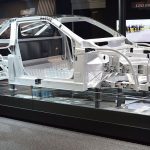
Structural and Body Repair:
The vehicle’s frame is checked and repaired first, as it is the foundation on which everything else is built. This may involve using a frame machine to straighten the frame to factory specifications.
Following the frame repairs, body repairs are conducted. This includes repairing or replacing damaged body parts such as doors, fenders, bumpers, and hoods.
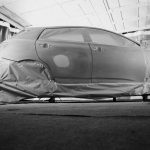
Painting and Refinishing:
After structural and body repairs are complete, the vehicle moves to the paint department. Any new parts or repaired areas are prepped, primed, and sealed to prevent corrosion.
The vehicle is then painted to match the existing color and finish. Finally, a clear coat is applied to protect the paint and ensure a uniform gloss.
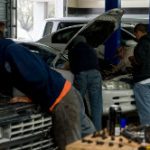
Reassembly:
Once painting is completed, the vehicle is reassembled with all repaired or replaced parts, including exterior and interior components.
ADAS Calibration and Functional Checks:
Given the prevalence of ADAS in modern vehicles, careful attention is paid to checking and recalibrating these systems back to factory specifications. Calibration ensures that the vehicle’s safety and assistance systems operate correctly, essential for the safety of the vehicle’s occupants and other road users.
The calibration process, which can involve both static and dynamic methods, is crucial for aligning sensors, cameras, and radars accurately. Functional checks are conducted to verify the proper operation of all ADAS features.
Post-repair Inspection and Testing:
A post-repair scan is performed to ensure no error codes or issues remain.
The vehicle undergoes a thorough quality control check, including a test drive to ensure all repairs meet safety and performance standards.
Vehicle Cleaning and Final Presentation:
The vehicle is cleaned inside and out, removing any dust or debris from the repair process.
A final inspection is performed to ensure the vehicle is returned to the customer in a pre-accident condition or better.
Customer Walk-through and Delivery:
The repair facility schedules a meeting with the customer to go over the repairs and address any questions.
The customer inspects the vehicle and, upon satisfaction, the repair process is considered complete.